WooCommerce
Overview
In this guide, we will look at how to install the BillEase plugin and how it can be configured with all the information it needs to function properly.
We will cover how to install the plugin, check if it is installed correctly, and how to configure the plugin.
Please ensure that you follow these instructions and feel free to reach out to us if you have any questions.
Step 1. Installing the plugin

- Download the plugin zip package.
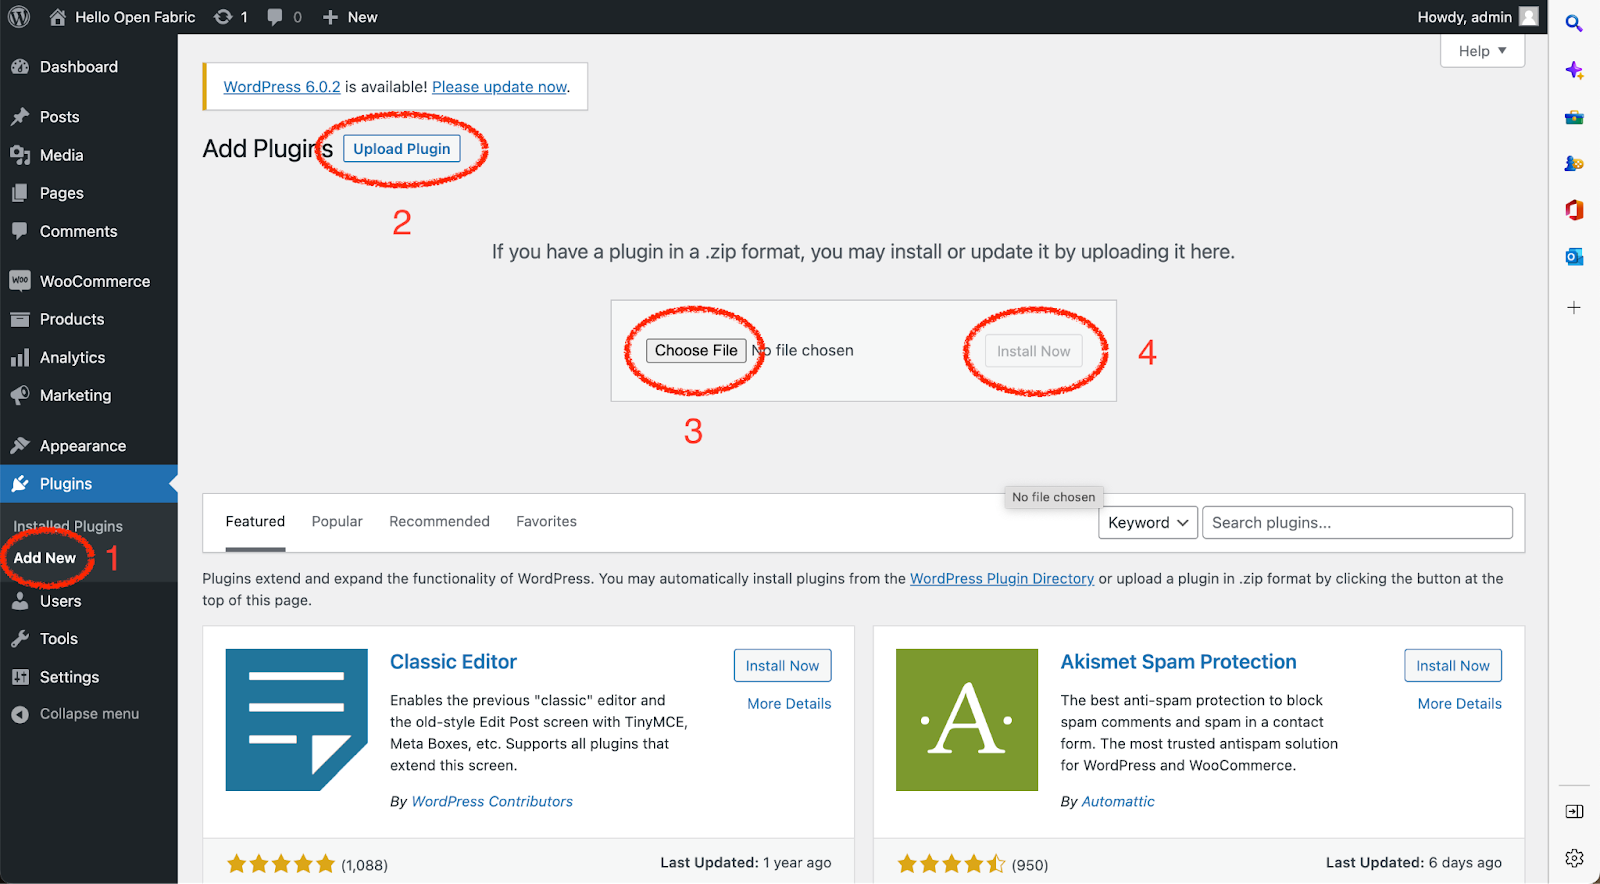
- In the WordPress dashboard, go to Plugins > Add new.
- Click the "Upload Plugin" button, select "Choose File" then browse to the zip file.
- Click "Install Now".
- Finally, click "Activate Plugin".
Step 2. Verify plugin is installed

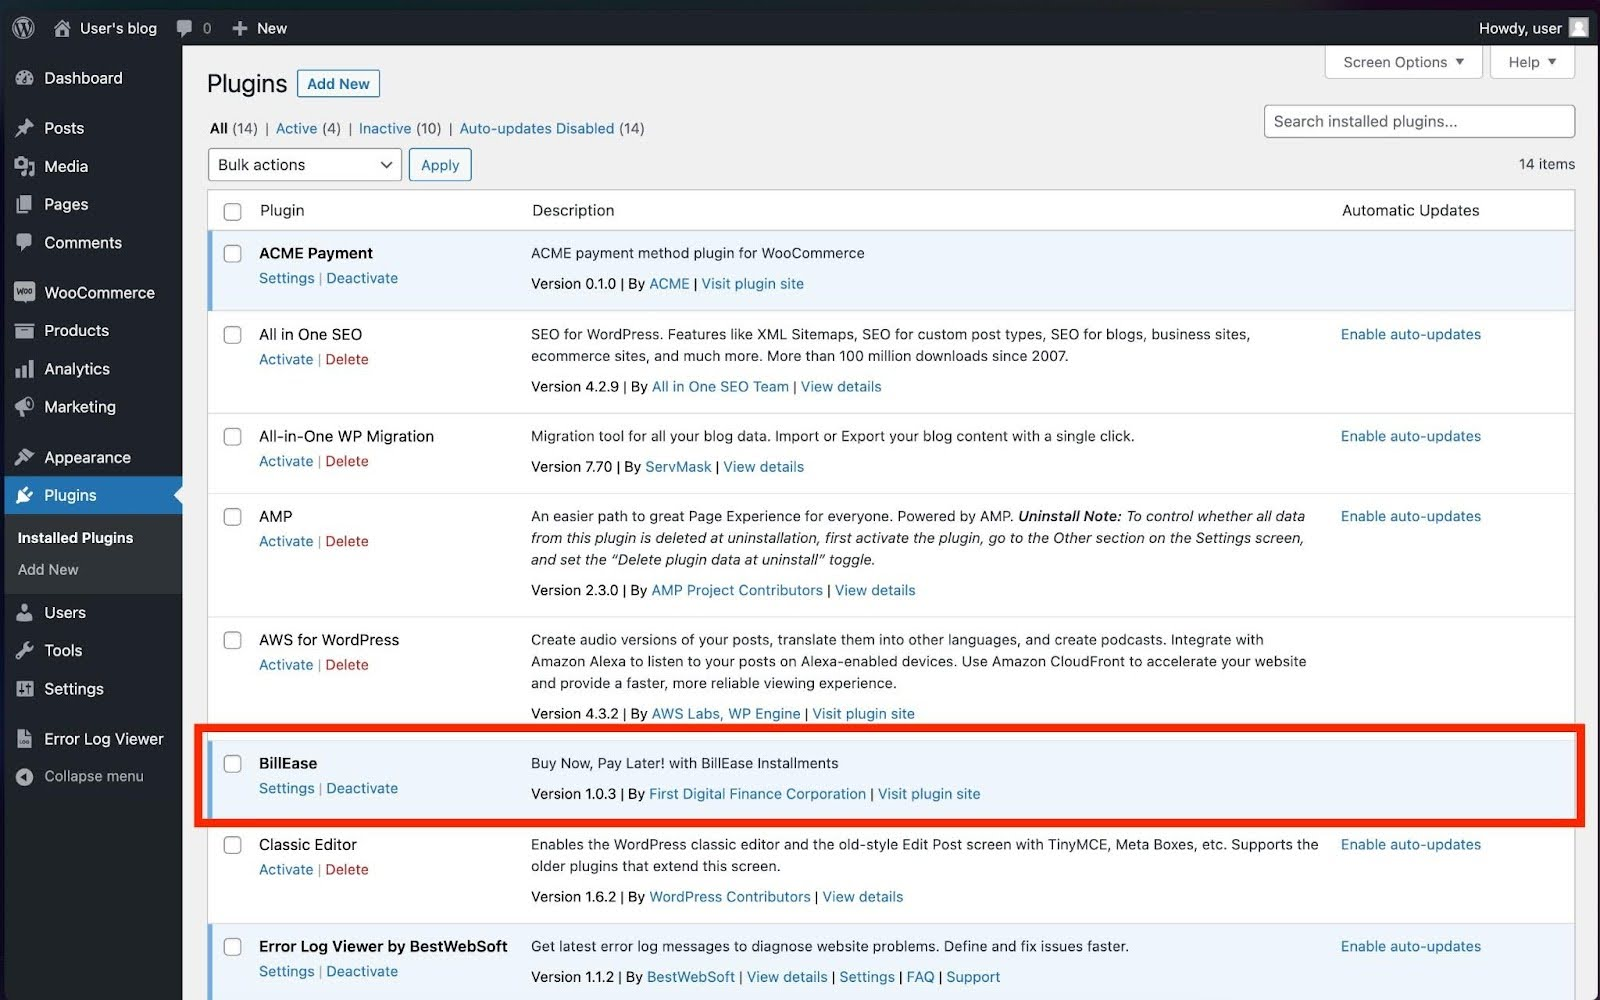
- In the WordPress dashboard, go to Plugins.
- You should now see the "BillEase" plugin.
- Ensure it is activated.
Step 3. Go to Payment Plugin Settings page

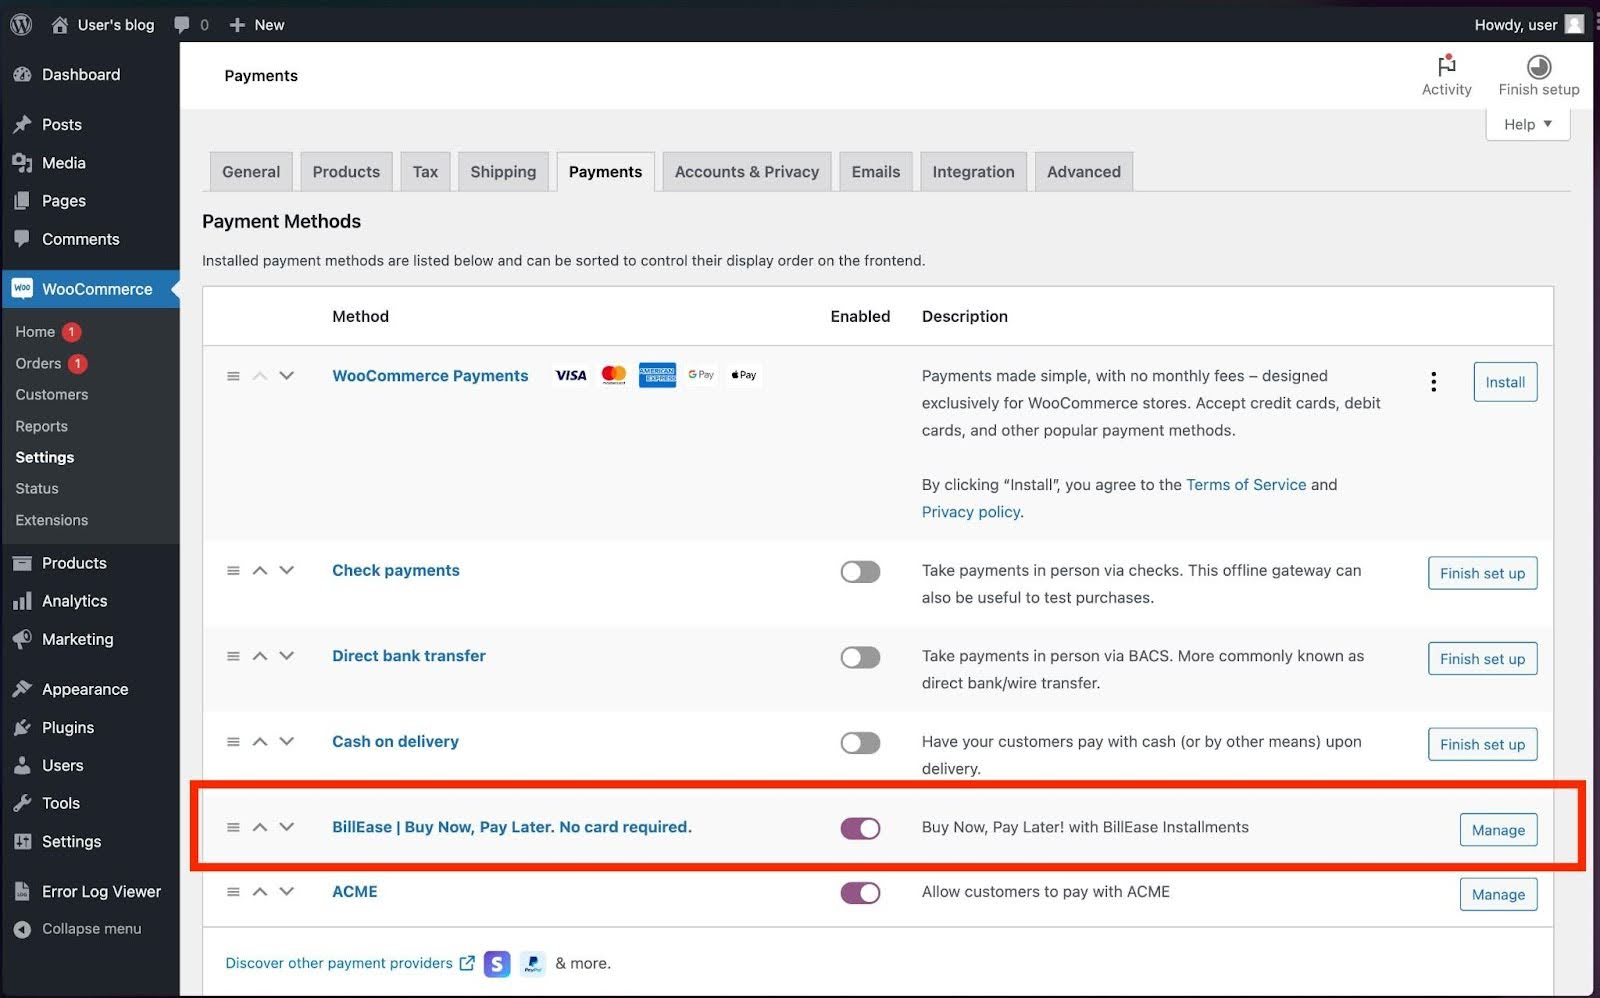
- In the WordPress dashboard, go to WooCommerce > Settings.
- In the Settings Page, you should see various different tabs. Go to Payments tab.
- You should see "BillEase | Buy Now, Pay Later" listed as a Payment Method.
- Ensure that the plugin is enabled. (If it is not enabled, it will not be shown in the consumer checkout flow, even if it was fully configured).
- Click "Manage" for "BillEase | Buy Now, Pay Later" to configure the plugin.
Step 4. Configure the plugin

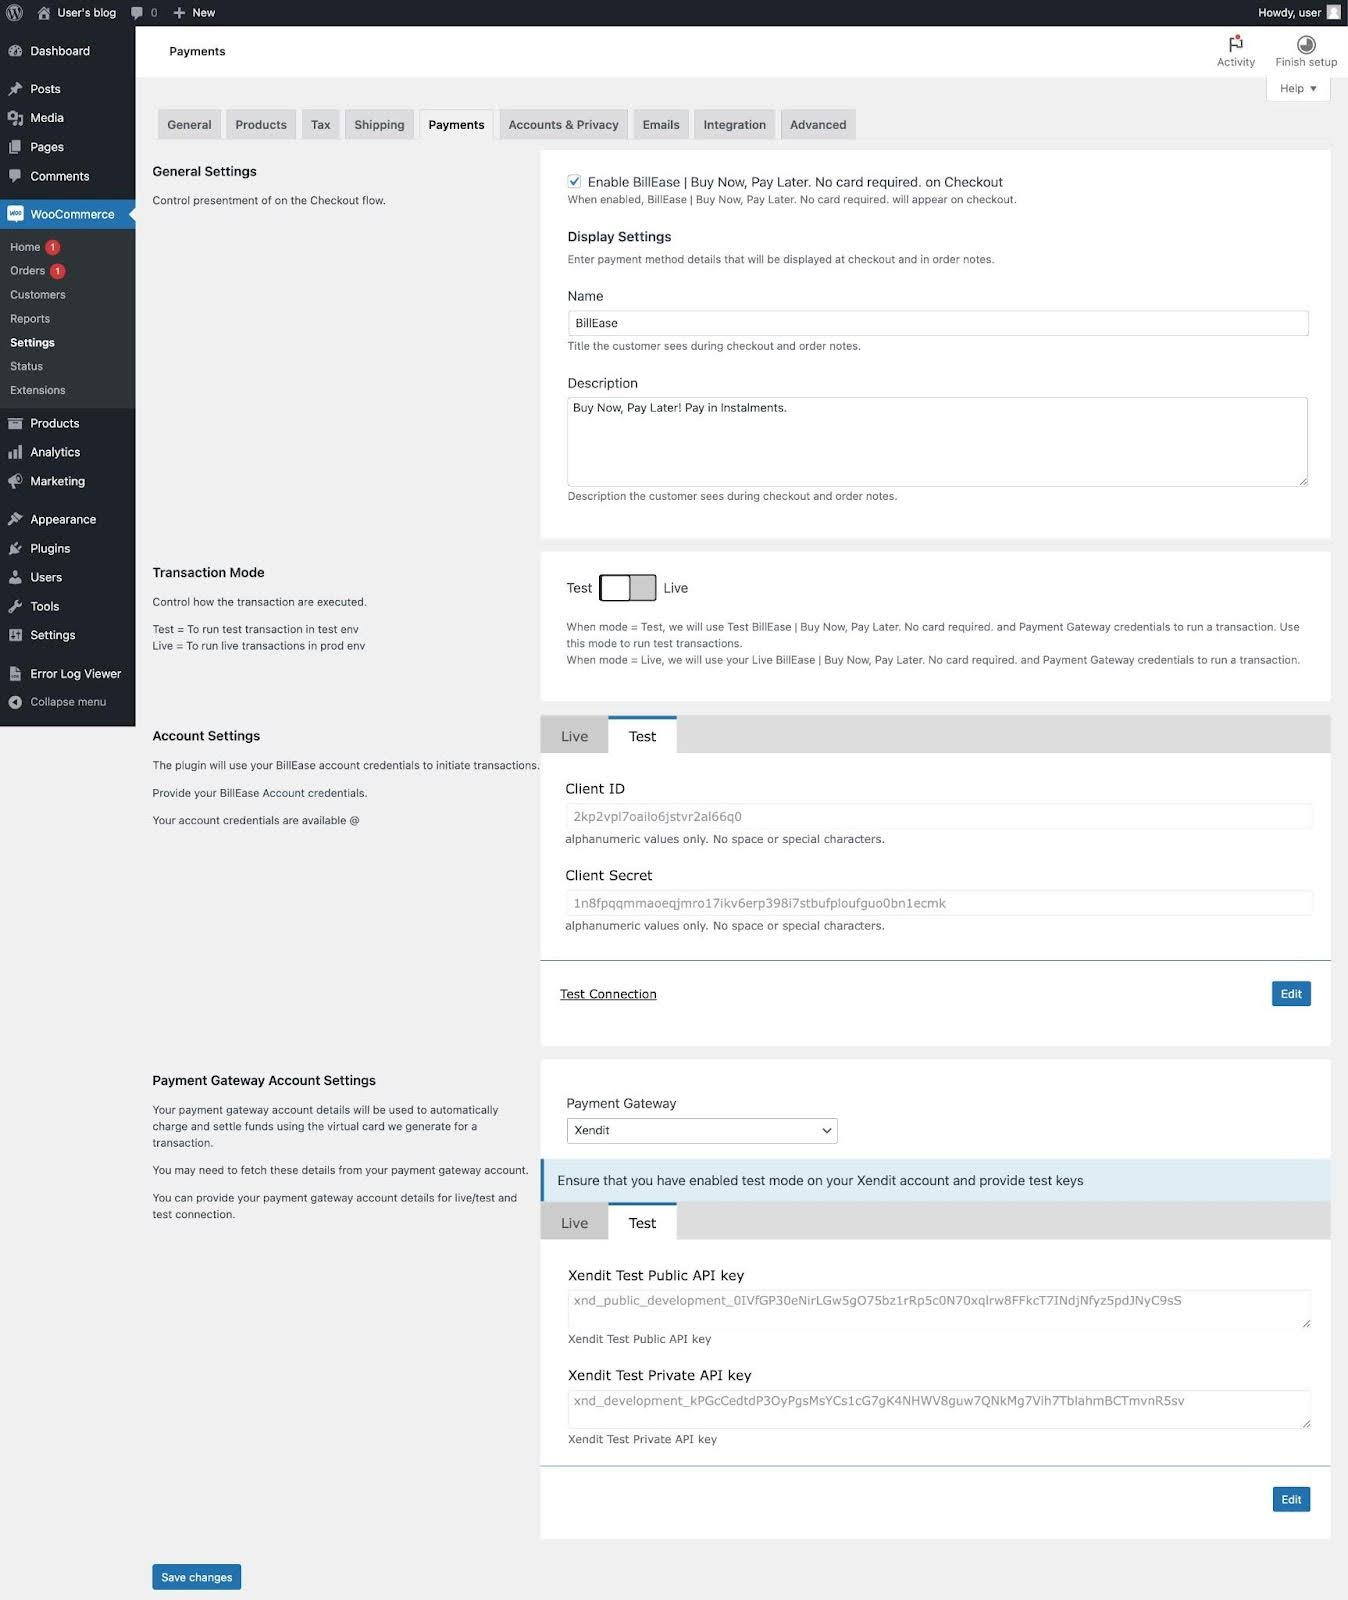
Under General Settings, ensure the following:
- The "Enable BillEase" checkbox is checked
- "Name" is set to "BillEase"
- "Description" is set to "Buy Now, Pay Later! with BillEase Installments"
Under Transaction Mode, toggle the button to the environment you are running transactions.
- Test to run transactions against sandbox (for testing)
- Live to run transaction against production (live customer transactions)
Under Account Settings,
- Edit and enter the right Client ID/Client secret that is shared by us for both Test and Live environments (by clicking on the appropriate sub-tabs).
- "Save" the settings.
Note: if the Client ID/Client secret is not filled in for an environment, transactions will fail for that environment and the BillEase button itself will not show.
Under Payment Gateway Account Settings,
- Select your Payment Gateway from the dropdown.
- For the selected Payment Gateway, edit and enter your PG’s API Credentials for both Test and Live environments.
- "Save" the settings.
Please Note
- Ensure all the settings were saved without any error.
- If there was any issue with the settings, BillEase will not show up during transaction.
- Reach out if you face any issues.